 14 years ago
Worms: Revolution review (XBLA)
Worms: Revolution was developed by Team 17 and published by Warner Bros. Entertainment. It was released on October 11, 2012 for 1200 MSP. A copy was provided for review purposes.
Worms, Worms, Worms. The Xbox Live Marketplace has seen Worms, Worms 2: Armageddon and Worms: Ultimate Mayhem, and now we’ve got Worms: Revolution. That’s really quite a bit of Worms, it’s strange to imagine that the artillery shooter genre is in such high demand to warrant four Worms games all in one place. Since each of the games have been at least competent, enjoyable, playable iterations all more or less with the same problems, was there really space available for another Worms game? Worms: Revolution had no space to fit into, so instead Team 17 cut the fat, renovated the foundation of the game and built something grander, smoother, and far more polished than its precursors.
But it’s still a Worms game. It’s a Worms game with Worms problems and Worms humor and Worms entertainment and if that’s all well and good then get right on board the Revolution train, but for everyone else there’s a cache of new features to consider. Worms: Revolution adds a class and formation system, dynamic water, physics objects and several new utilities and weapons. There’s a lot going on in this Worms game, a lot of new things, all piled on top of a 17-year old foundation that still works. Well, it works for multiplayer, the AI still makes single player a chore. Read More
 14 years ago
Mark of the Ninja complete scrolls guide
We show you how to keep to the shadows and collect all the game’s scrolls.
Read More
 14 years ago
Jet Set Radio review (XBLA)
Nostalgia does not a game make. Nostalgia is the stuff of memories, the stuff of impressions often from a time where taste is unrefined and based on “video games” versus reality (usually video games win, hopefully). Jet Set Radio feels really old. It’s rife with this strange mix of a great gameplay idea, nifty characters and a zany environment but it’s all bogged down with bad level design and flow. By no means is it “bad”, but it’s certainly not up to today’s standards of platforming games, and the proof is in a classic Xbox game: Jet Set Radio Future. There’s a reason they made it the same game but better.
For those of you out of the SEGA-centric loop, Jet Set Radio is an HD remake of the Dreamcast release of Jet Set Radio, a 3D action platformer involving crazy Japanese youth, graffiti and magnetized roller blades. The theme of a group of graffiti-wielding roller blade punks combattin an oppressive, insane private authority muscling in on the town of Tokyo-to (not to be confused with Tokyo) is the setup for Jet Set Radio. Players select from different characters from a group of rudies (the aforementioned punks) called the GGs. Tokyo-to is divided into three major areas each with three sub-areas where players must complete various story challenges to unlock more characters and get to the bottom of the recent craziness in the city. The idea works. It’s just the rest of the game that’s hit and miss.
 14 years ago
Hybrid guide – Developer Tips & Tricks
If you didn’t get enough out of our Hybrid build guide or are simply curious about how the folks at 5th Cell play Hybrid, check out these tips and tricks from the QA team. If you need more, there’s even some level guides available now as well.
Attacking
Jump Jetting
- Dodging: Get used to moving around while you’re attacking to avoid enemy fire. Not only will this tactic make it hard for your enemy to shoot you but the bots won’t be able to hit you if you’re moving in a circular motion.
- Boost Timing: Use boost often, but make sure you have it ready when you need it. Boost right when you take off and a second before you land to get through the landing sequence faster. If you boost too late, you won’t be able to fire for a short time after landing.
- Retreat: Make sure to retreat if you’re low on heath or something unexpected occurs. If you’re low on heath, try not to land at a cover in the enemies view since the landing sequence is slow.
- Scanning: You can use your selection arrow to identify an enemy’s position even if they are obscured from view. Select a cover you think an enemy is hiding and jump jet to it. While jetting to the cover press the vault button (Y) to move your selection arrow to the far side of cover and move it from side to side. If your arrow gets displaced from one of the main 3 positions there is an enemy there. Read More
 14 years ago
Hybrid guide – Level Maps & Tips
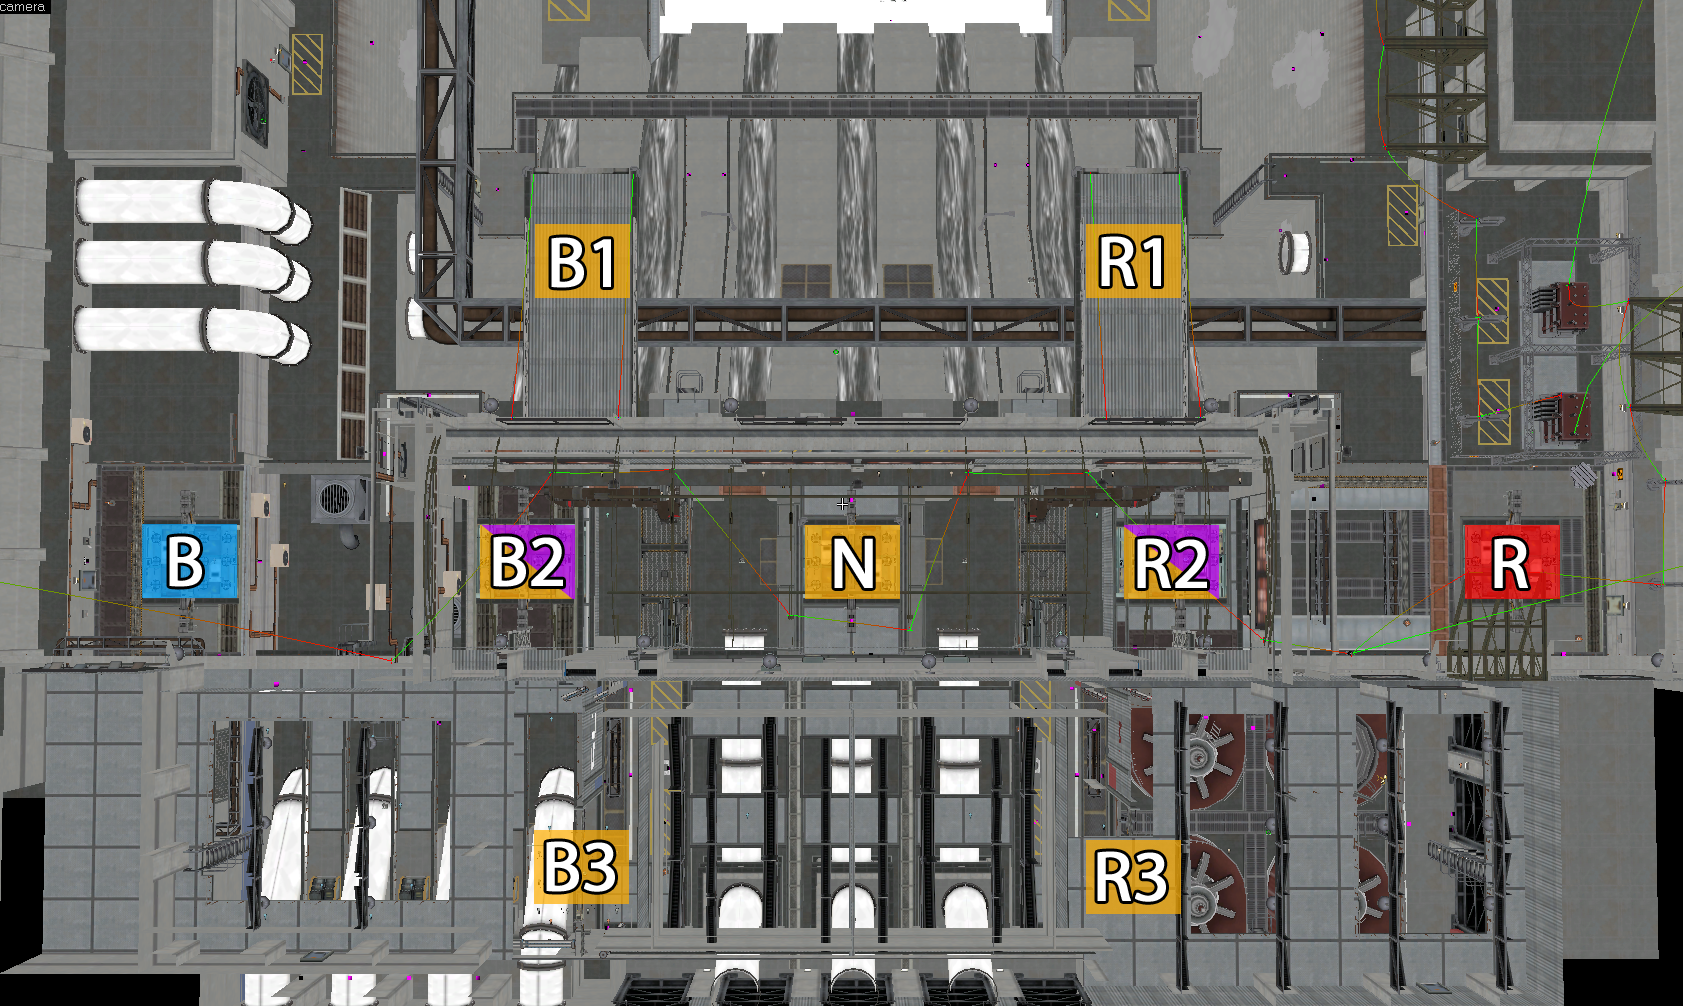
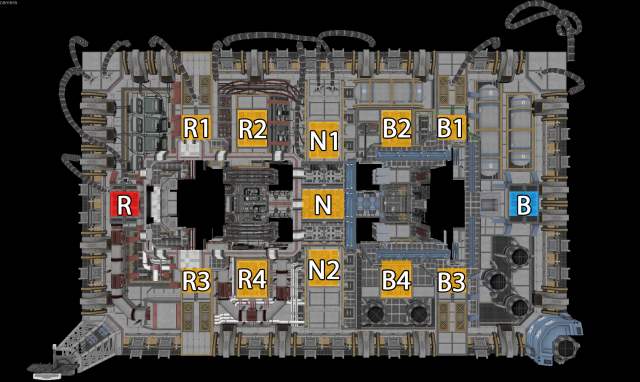
For those of you out there still fighting the good fight between Variants and Paladins, we’ve got some extra assets for the war effort. 5th Cell was kind enough to send us some full images of each map currently available in Hybrid. They’ve color-coded the maps and we’ve added IDs to each cover (they’re different from the ones in-game because these are easier) for your assistance. Orange cover areas are ground-based, purple ones are below ground/other cover, and green ones are on the walls. We’ve provided some simple tips for you to design map strategies around, but feel free to download the maps and work your own magic on them.
Airfield
- Combat tends to localize over N, N1 and N2, controlling N1 and N2 simultaneously leads to map domination
- There’s a route from R1 – R3 and B1 – B3 which is great for escapes and surprise attacks
- R and B are the most defensible positions on the map, artifact/overlord gameplay will almost always centralize around those two points
- Having people at both R1/R3 and B1/B3 respectively is the key to removing map dominance from N1/N2
- The B2/R2 and B4/R4 spots on the map are great hiding places for catching people off guard, waiting for regeneration or resetting cooldowns
 14 years ago
Mark of the Ninja scrolls and challenges guide – Ink & Dreams
Scroll #1
Scroll #2
Scroll #3
Back to Guide Hub > Skip to Breaching the Perimeter
Mark of the Ninja scrolls and challenges guide – Breaching the Perimeter
Scroll #1
Challenge Scroll
In our very first challenge gate we’ve got a bit of Limbo-puzzling to do regarding big metal doors and crates. The first and obvious decision to …
Read More
Mark of the Ninja scrolls and challenges guide – Set to Flight
Scroll #1
Scroll #2
Challenge Gate
This gate is one of the longest ones, it’s even got a mid-challenge checkpoint! That said, you shouldn’t be needing it since we’ll …
Read More
Mark of the Ninja scrolls and challenges guide – The Return
Scroll #1
Challenge Gate
Ahhh, the final challenge gate! So far, they’ve all been easy, right? Must be the whole guide thing. This one shall be no more …
Read More
Mark of the Ninja scrolls and challenges guide – The Fall of Hessian Tower
Scroll #1
Challenge Gate
Here we have another Limbo-esque challenge to overcome. This one’s a little bit more involved, but it’s the same idea. The first step is to …
Read More


