Hybrid guide – Level Maps & Tips
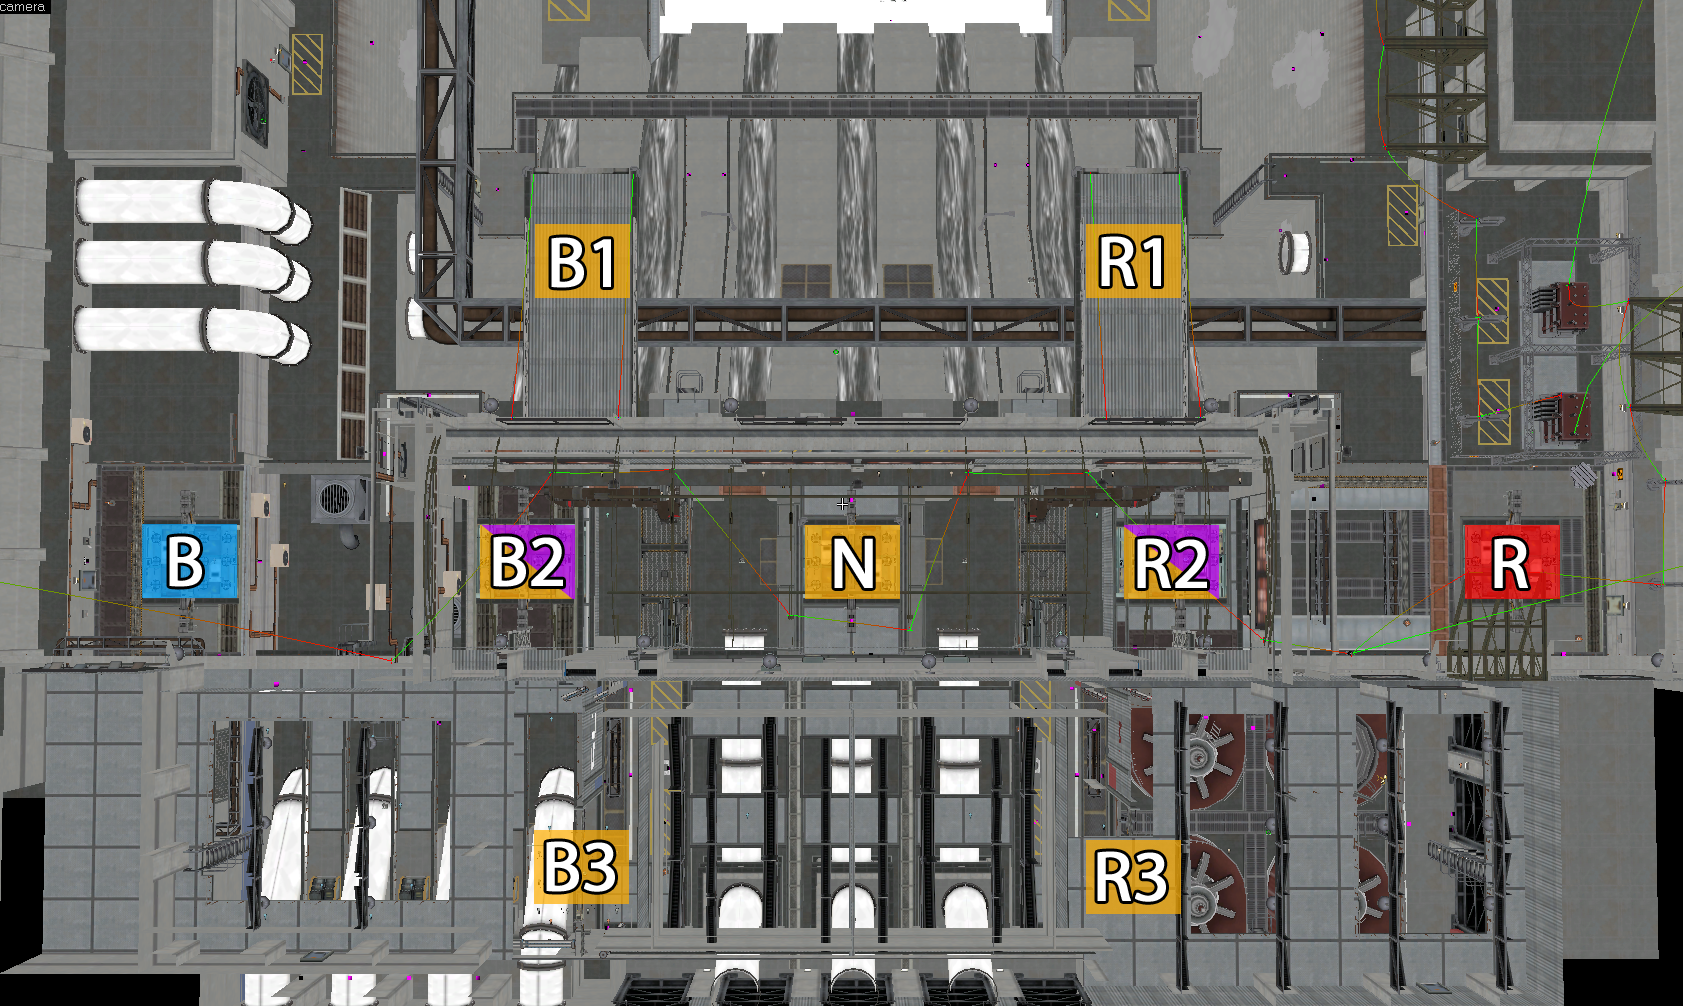
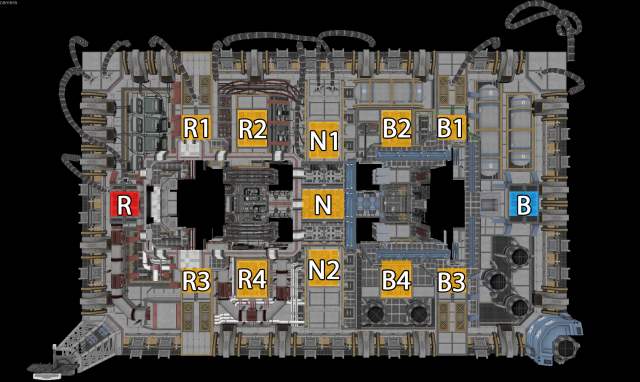
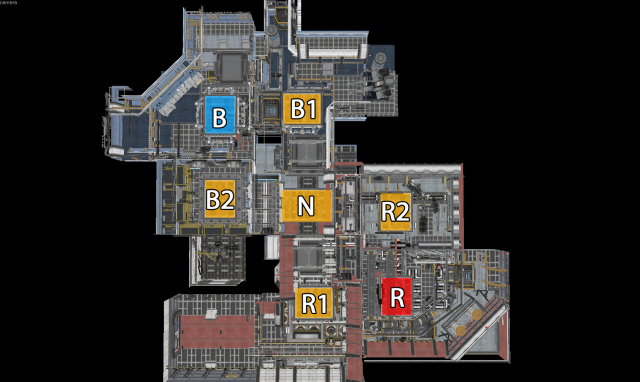
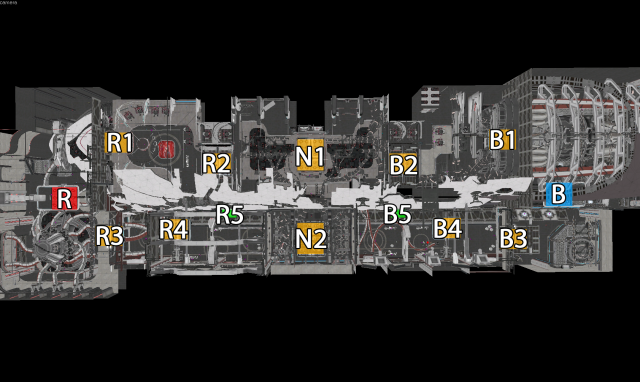
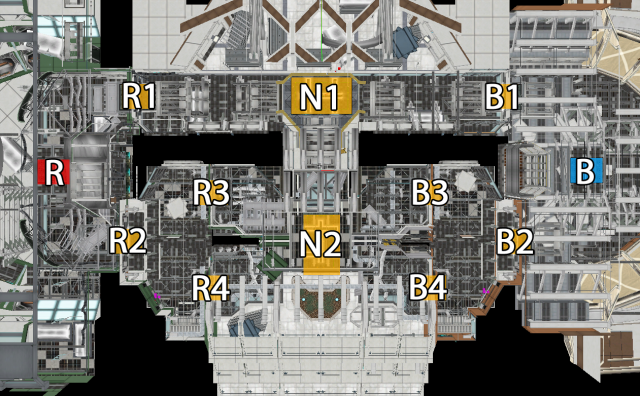
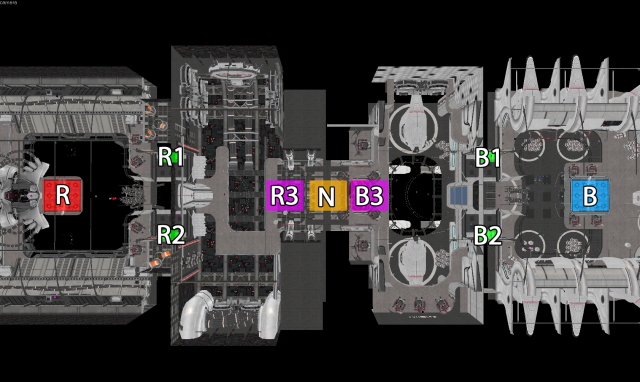
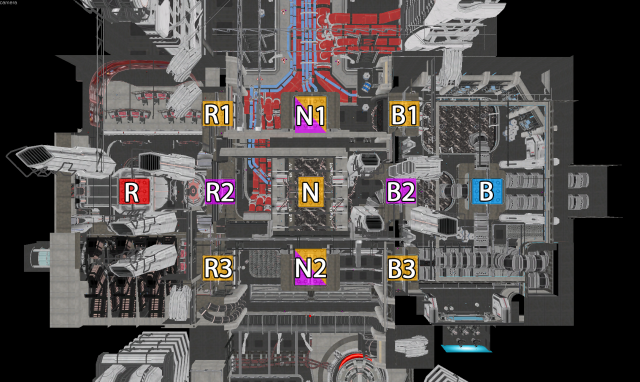
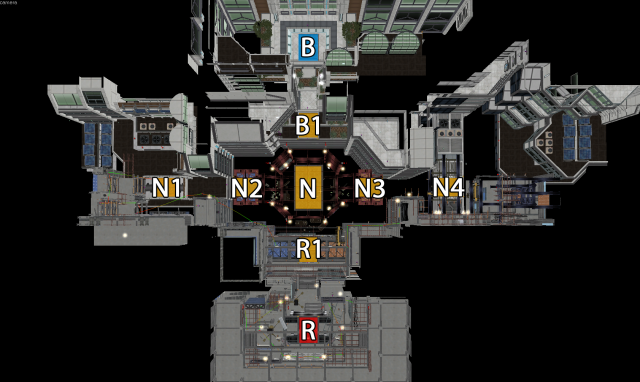
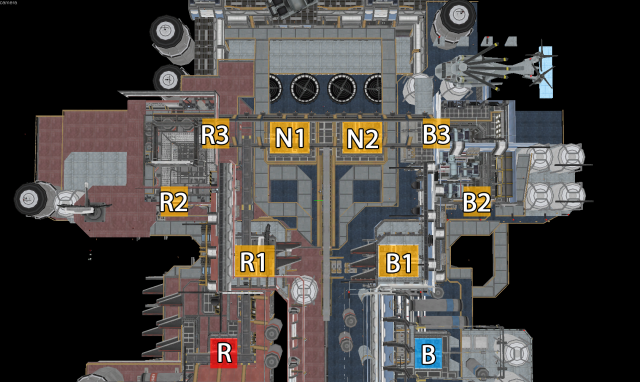
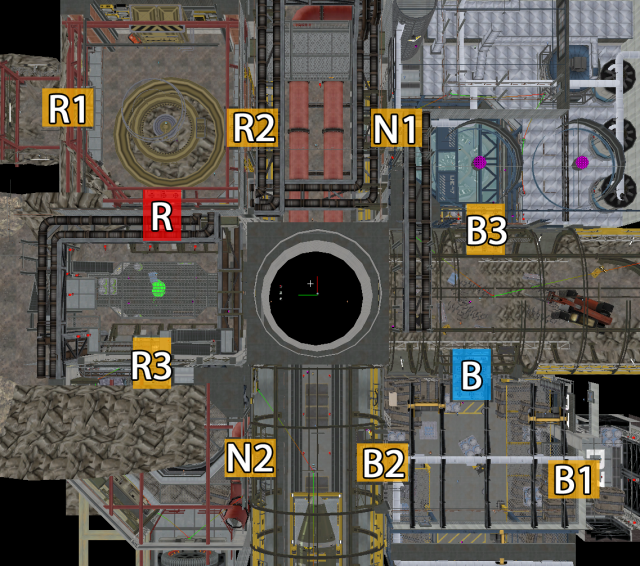
For those of you out there still fighting the good fight between Variants and Paladins, we’ve got some extra assets for the war effort. 5th Cell was kind enough to send us some full images of each map currently available in Hybrid. They’ve color-coded the maps and we’ve added IDs to each cover (they’re different from the ones in-game because these are easier) for your assistance. Orange cover areas are ground-based, purple ones are below ground/other cover, and green ones are on the walls. We’ve provided some simple tips for you to design map strategies around, but feel free to download the maps and work your own magic on them.
Airfield
- Combat tends to localize over N, N1 and N2, controlling N1 and N2 simultaneously leads to map domination
- There’s a route from R1 – R3 and B1 – B3 which is great for escapes and surprise attacks
- R and B are the most defensible positions on the map, artifact/overlord gameplay will almost always centralize around those two points
- Having people at both R1/R3 and B1/B3 respectively is the key to removing map dominance from N1/N2
- The B2/R2 and B4/R4 spots on the map are great hiding places for catching people off guard, waiting for regeneration or resetting cooldowns
Cache
- This is one of the smallest maps in the game; you won’t be doing much sniping here.
- Staying in-transit can make this map easy to dominate, especially if you’ve got a shotgun and and a defensive ability.
- Grenades are really useful due to the close quarters and lack of places to retreat to.
- Trying to camp N won’t work too well for too long unless everyone on your team has long-mid weapons and a lot of skill.
- There’s not much time to take down Preyons in this map, so try to stay alive long enough to get one.
Drydock
- Drydock is an amazing map for sniping, if you can run the R1B1/R3B3 spots on the map, you can control entire quadrants of the map.
- The path between N1 and N2 is dangerous, warbringers tend to congregate over the course of a match- hack grenades work wonders here.
- The R5/B5 slots are great for pressuring the N2 spot, and they’re very defensible locations.
- The bottom half of the map is far more traveled, so if you need to sneak around, the top half is a good choice for that.
- Due to the long lines of sight in this map, teleport becomes a very useful offensive ability.
Financial
- The R/B2, 3 and 4 areas are great for making escapes, especially in Artifact/Overlord.
- Due to its directness, R1 – N1 – B1 will be a much traveled route, stay tuned to that area for easy snipes.
- R and B are incredibly defensible due to the angle of entry, you don’t want to let the whole enemy team group up there in an objective gametype.
- N2 is a super vulnerable location, but it’s a good place to place warbringers; defend at your own risk
- Mid-range weapons are pretty much a must here, the lines of sight are long as are traversal times, despite an abundance of strafe room.
Generator
- Generator is a very popular map due to the ridiculous amount of sight lines- nowhere is safe, so don’t camp if you can avoid it.
- B and R are safe spots, but they’re easy covers to dispatch with a single grenade, and there’s plenty of space for follow-up fire with mid-long range weapons.
- If you ever have someone at N, you’ll likely need someone at R1/B1 or R3/B3 for cover purposes, or they won’t last long.
- Moving together can be very dangerous, having a wide collective field of view on Generator with mid-long range weapons is the key to dominance.
- Going below on B2/R2 is a great way to sneak into the middle of the map, and can even be targeted by/target the outer cover locations.
Payload
- While the center of this map is, of course, a major point of contingency, the R1/B1 and R2/B2 locations will be frequently fought after.
- If you don’t see the enemy team, they’re probably on the opposite side of the massive wall between B1/R1 and B2/R2.
- Holding R3 and B3 is often easier than holding N, forcing the enemy to divide their fire makes it easier to defend the area.
- Sniping your way from B/R to N pays off when you get to snipe your way out from N- the enemy will often split up to attack and can thus easier be picked off.
- Satellite will be very helpful on this map.
Refinery
- Typically it’s safer and more advantageous to be on the top-side of Refinery
- The bottom areas make for great objective hiding locations
- Close-mid range weaponry does well here due to the proximity of each cover to each other
- R and B are actually more difficult to defend than N.
- Impact rounds make for a great ability on this map due to the amount of corners- you’ll need to pump out a lot of damage quickly while flying about this map.
Skyline
- Suppressing fire works incredibly well on this map when fighting over the middle four cover locations.
- Taking the B or R sections and one half of the N sections will give you retreating options- don’t let the enemy control three sides.
- Speaking of which, N has zero tactical value, only go there to capture locations if that’s the goal of the game.
- Sniping may not work so well on this map- while headshots are easy to pull off due to the level playing field, it’s way too easy to get flanked.
- Satellite will help keep the flanks in check, and Hack grenades are perfect for turning the tides when your opponents are dominating the map.
Stronghold
- The large field between R1 and B1 preventing you from going through makes both of those spots prime sniping locations.
- R3 and B3 are also prime cover locations, mid-long range weaponry is very useful here.
- To counter both of the aforementioned strategies, teleport will work wonders.
- N1 and N2 can be surprisingly easy to defend if you have at least one side of the map backing you up with cover.
- Meta shield and healing are great on this map when you’re defending N1 and N2, or even assisting from afar.
Warhead
- Since Warhead is cyclical, staying in one spot may be difficult due to constant flanking.
- For defending Artifact/Overlord players, R1 or B1 are prime locations for the hider, and the defenders should take up the advanced covers.
- Jetpack-strafing and landing with close range weapons out is quite potent due to the short range between covers.
- Smoke grenades can actually be quite useful on this map due to the ability to double-back to enemy positions when they think you’re going around.
- You can fire through the center of the map- that is, if you’re good enough.

