
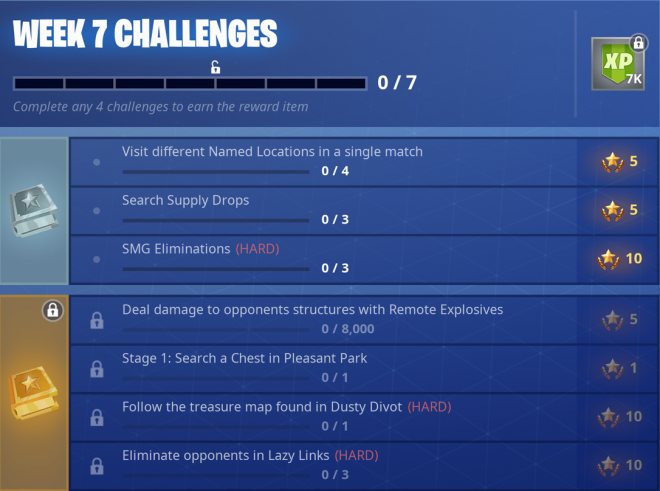
We have finally reached week 7. If you’ve completed every week thus far completely, this week’s challenges will reward you with the Road Trip challenge secret character. Thankfully, most of this week’s challenges are a piece of cake. We say most, as there remains one considerably harder challenge amongst the rest. It’s still fairly doable, but can be a bit hectic and a little irritating. Without further hesitation, let’s take a look at the challenges for week seven of season five.
Visit different Named Locations in a single match
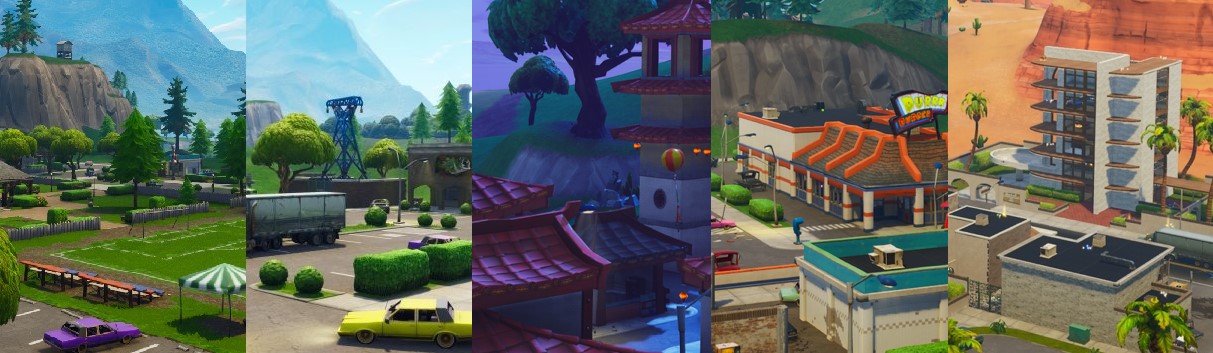
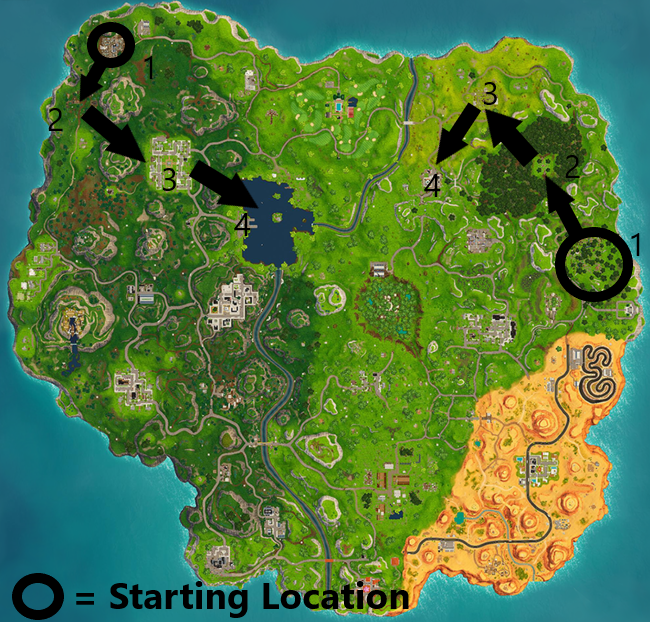
For this challenge, you simply need to go to four different named locations. This can easily be done in 50v50 considering the map is normally split in two and nobody will really bother you going from one place to another. If that’s not really what you fancy, doing this in any other normal mode is easily accomplishable as well. The best places to do this are up north. Going from Junk Junction to Haunted Hills, traveling over to Pleasant park and finally over to Loot Lake will give you this challenge complete. You could also start at Lonely Lodge, make your way to Wailing Woods, head northwest to Risky Reels, and end at Tomato Temple. Really any four locations will accomplish the challenge, but these seem to be the closest locations without too much distance between each other.
Search Supply Drops
This can be considered the hard challenge of this week. There are two ways to accomplish this task; both are tedious in their own ways. The first way to get three supply drops would be to play 50v50. As long as you’re in the circle, supply drops will fall from the sky a lot more often than they would in any other match. Landing in the circle immediately and waiting on supply drops can hopefully get you what you need. It may take a few matches, but the goal is accomplishable. The only issue doing this method is the plenty of other players challenging you on who gets the drop first.
The other method for accomplishing this goal would be to play standard matches of solos, duos, or squads. Sit on the outside of the map when you first drop, and always stick to the outside of each circle. Other players normally tend to stick to the more central areas, so there’s more of a chance you’re likely to get a supply drop to fall down somewhere relatively close. Other players could be doing the same thing, so being on your guard is necessary. What makes this method tedious is how considerably boring the match is waiting for the circle to move, or even for supply drops to fall. You’ll need a total of three, they are cumulative and do not all need to be collected in one match.
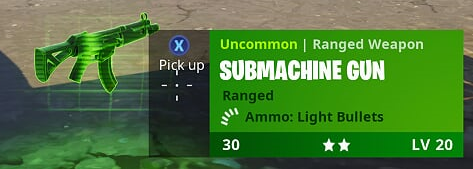
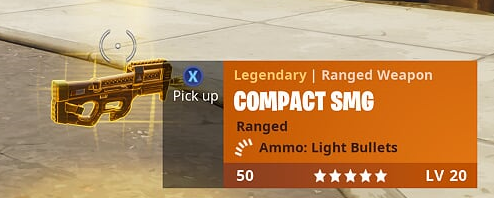
SMG Eliminations
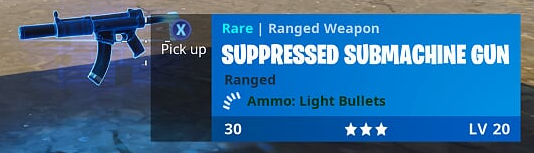
This is just about as easy as challenges come. Getting SMG eliminations should be something you do on a regular basis. The best times to use an SMG are when you first land at the beginning of the match. Most enemies who land with you do not have shields, so you only need to worry about getting the elimination. Of course, it can be even easier downing an opponent in duos, squads, or 50v50 with another weapon and finish them with an SMG. Here are the weapons you need to be on the lookout for.
Deal damage to opponents structures with Remote Explosives
This challenge sounds daunting, but thankfully it’s not as bad as it sounds. Remote Explosives are the C4 looking explosive that can be thrown down with the right trigger and detonated with the left trigger. When going for this challenge, not only do the structures damaged by the explosive count, but any structure that is destroyed due to gravity will also count towards the challenge. That being said, doing this in soaring 50’s is easy. Landing on the enemy side and waiting for them to build up before placing the explosive and destroying it should get you relatively close or even complete the challenge on the first go. But even just playing any game mode and using the remote explosives to destroy the opponent’s structures will count.
Search a chest at (Location Name)
The next challenge has five different stages of completion. Each stage involves collecting one chest at a certain location. The five stages will be listed below, along with a map of the chest locations and a short explanation of chest locations.
Stage 1: Search a Chest at Pleasant Park
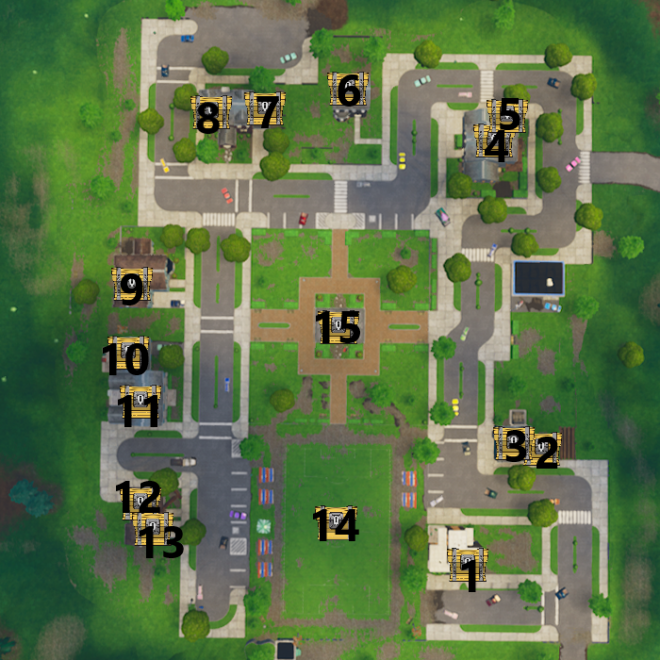
- In the garage of the modern house to the southwest.
- Above the garage of the eastern house.
- In the storm cellar of the eastern house.
- In the attic of the northeast house.
- In the doghouse outside
- In the attic of the northern house.
- Above the garage of the northwestern house.
- In the attic of the northwestern house.
- In the attic of the middle western house.
- Above the garage of the lower western house.
- In the attic of the lower western house.
- Under the ceiling of the lower roof of the southwest house. (the one with the tree collapsed on top).
- Under the ceiling of the higher roof of the southwest house.
Stage 2: Search a Chest at Retail Row
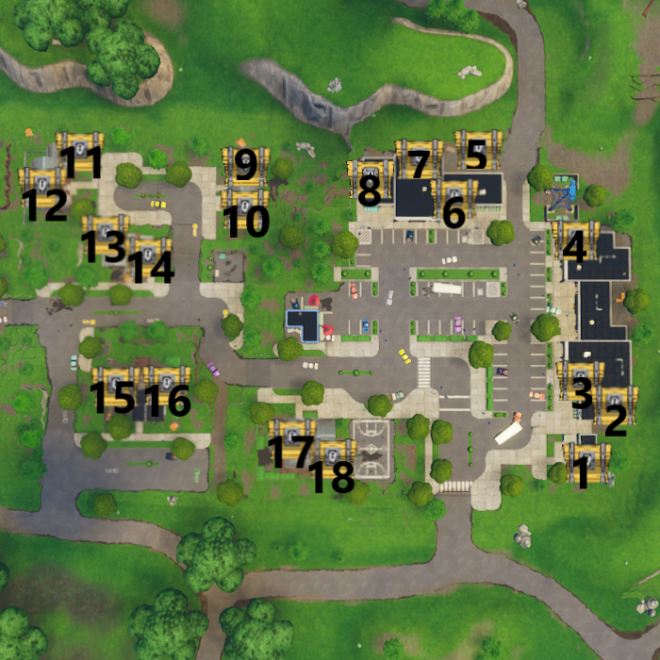
- On top of the water tower.
- Behind the bar.
- 2nd floor of the bookstore. Go through the door and turn left, it’s in a corner.
- 2nd floor of the fishing store. Go through the door and hang a right. Alternatively, you can reach this chest by landing in between the bookstore and the fishing store and going through a door as well.
- Inside of the truck parked here.
- Inside the detective agency on a desk.
- After destroying the garage in the back of the food market, it’ll be above you on a metal shelf. Can be easily accessed by building stairs on the outside and destroying the wall.
- In the far left side of the food market.
- In the attic of the northern white house.
- Above the garage of the northern white house.
- Above the garage of the red brick house.
- In the attack of the red brick house.
- Located at the very top of the destroyed house. Destroy the roof to access it.
- In the basement of the destroyed house in a small room behind a wooden crate.
- In the attic of the balcony house.
- In the room straight ahead of you upon reaching the 2nd floor from the stairs in the balcony house. The chest will be behind the door as soon as you walk in.
- In the attic of the southern white house.
- In the dog house in the back of the southern white house. Destroy the dog house first to be able to be able to open the chest.
Stage 3: Search a Chest at Lucky Landing
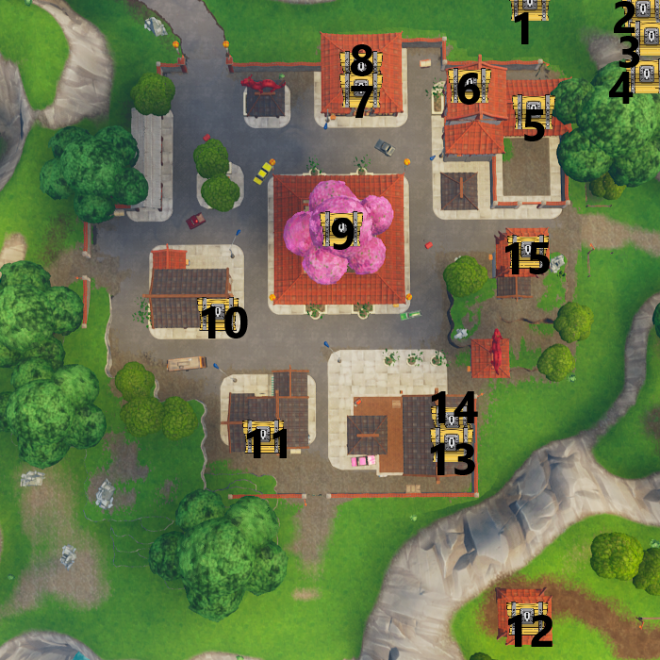
- On the top of the northern hill under a little pagoda.
- In the northwestern pagoda at the very top. Land on the very top roof and destroy it to access this chest.
- In the northwestern pagoda on the second level.
- In the northwestern pagoda on the first floor.
- Under the enclosed roof on a short dresser.
- In the attic of the northeast house.
- Behind the counter of the restaurant.
- On an enclosed ledge above the middle door of the restaurant, build a staircase and destroy the wall to access this chest.
- In the middle courtyard. Destroy the tree to access this chest.
- On an enclosed ledge on the western second story apartment. Destroy the roof or build a staircase up to access.
- On an enclosed ledge on the southwestern second story apartment. Destroy the roof or build a staircase up to access.
- In the middle part of the pagoda, build a staircase and destroy the wall to access.
- On the second level in an office
- On an enclosed ledge on the southeastern highest level. Destroy the roof or build a staircase up to access.
- Inside the pagoda in the eastern-center of town.
Stage 4: Search a Chest at Greasy Grove
- Behind the northern side panel of Durr Burger. Destroy the orange panel and you’ll find the chest.
- In the basement of Durr Burger.
- In the doghouse right outside the house.
- In the attic of the eastern house.
- Above the garage of the eastern house.
- On the second floor of the hunting store behind some counters.
- On the second floor of the hunting store behind some counters.
- Behind a wall on the second floor level of the hunting store. Land on the southern ledge outside and destroy the eastern wall to access.
- In the attic of the central-eastern house.
- In the attic of the southeastern house.
- Above the garage of the southeastern garage.
- Under the gazebo between the south and southeastern houses.
- In the attic of the southern house.
- Above the garage in the southern house.
- In the attic of the western house.
Stage 5: Search a Chest at Paradise Palms
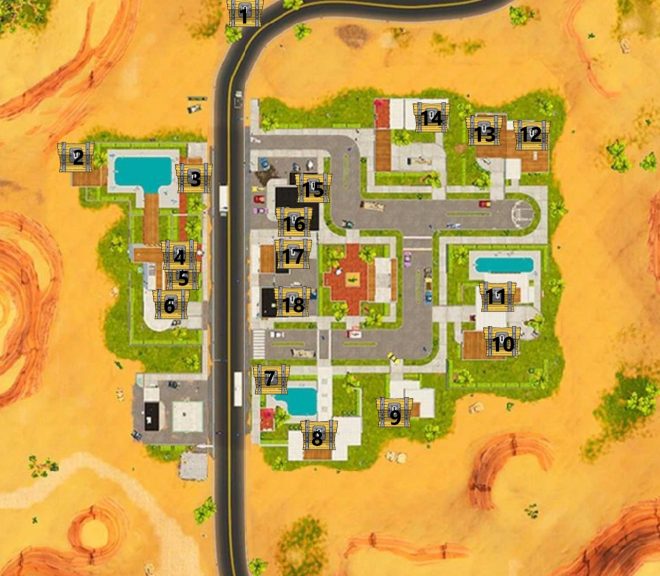
- On top of a carriage just outside of town.
- To the right of the curtained building near the pool behind a hedge.
- Behind the bar.
- 3rd-floor room.
- 4th-floor room.
- On the roof of the hotel.
- next to the pool in a corner.
- On a bed inside the southern-most house.
- In the bathroom on the 2nd floor. It will be the door straight ahead of you when you reach the top of the stairs.
- Immediately to your right after climbing the stairs.
- On the bed directly north of chest #10. Walking out the window and across the ledge to the bedroom, you’ll find this chest.
- Behind the bed.
- In the garage above the doors on a ledge.
- On a bed on the 2nd floor.
- In the dealership on the 2nd floor. You should see the glow of the chest from the first floor.
- Walking out the door from chest #15, place two floor builds down where the metal stairs are, and break the right-most wall.
- From chest #16, break the window, build a floor between the buildings and break the immediate wall ahead of you.
- This chest is on the 2nd floor of the last building in this row.
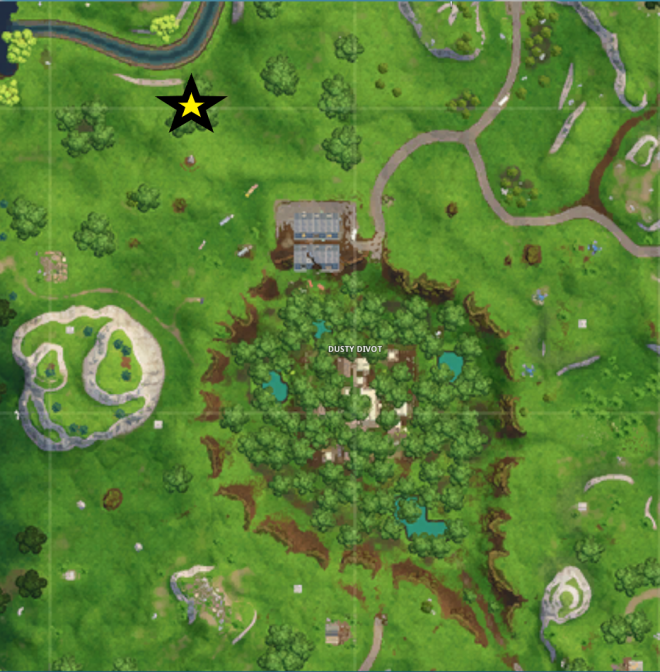
Follow the treasure map found in Dusty Divot
The map can be found in the northeastern part of Dusty Divot to the side of the guard tower located here. Here is the map you’ll be presented with:
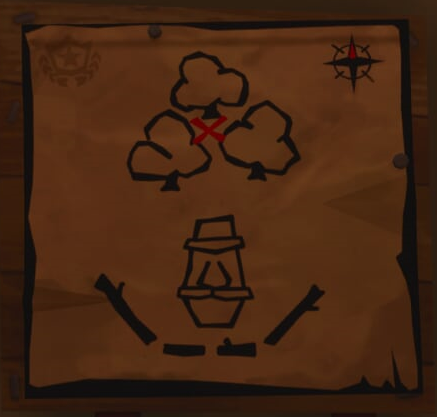
X marks the spot in between three trees just north of a statue with a blockade in front of him. The location of the battle star can be found just northwest of Dusty Divot, here is a map to help you find your way.
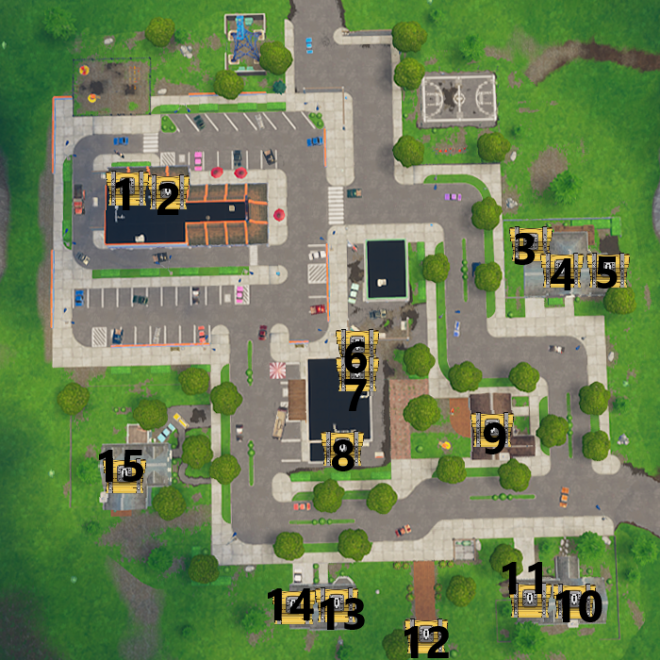
Eliminate Opponents in Lazy Links
The final challenge for this week asks you to eliminate three opponents in Lazy Links. This challenge is sure to be easy, but could also prove difficult, as there are few chests, and floor loot is more spread out than at other locations. Here is a small map of the chests in the center of Lazy Links to help you get armed.
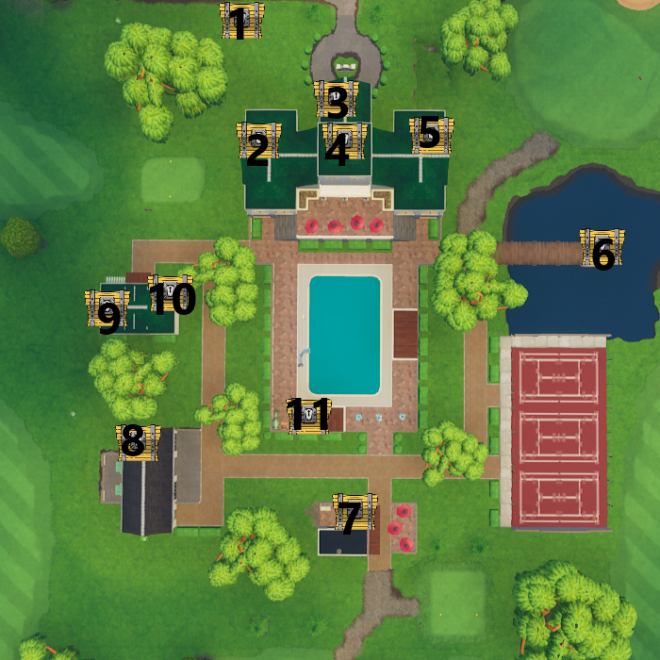
- In the back of the truck in the parking lot.
- Under the roof of the western wing of the main building.
- Under the roof of the northern wing of the main building.
- On the very top of the main building, under the roof.
- Under the roof of the eastern wing of the main building. You must destroy the north-easternmost roof to expose the chest.
- Under the gazebo in the middle of the lake.
- Behind the counter of the southern bar.
- In the garage in the far back right side.
- Under the roof of the western building, destroy the far west side to expose the chest.
- Behind the counter of the western building.
- In the building south of the pool behind a curtain.
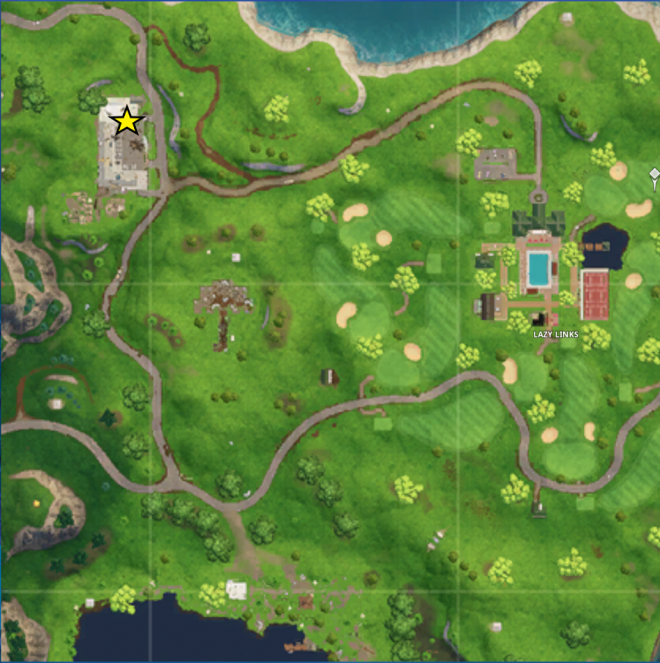
Secret Battle Star Location
After you finish all of this week’s challenges, you’ll once again be presented with a loading screen. As always the loading screen will pinpoint the exact location of the secret battle star. Here is what this week’s loading screen looks like.
Locating the secret battle star in this image seems very difficult. That would be because the icon is so transparent it’s next-to-impossible to see. If you cannot see it, you’ll notice the location is the motel. This is the same motel directly west of Lazy Links. The battle pass star is on a wall in between the turned over truck and the main building. If you need some help locating said star, here is a map.
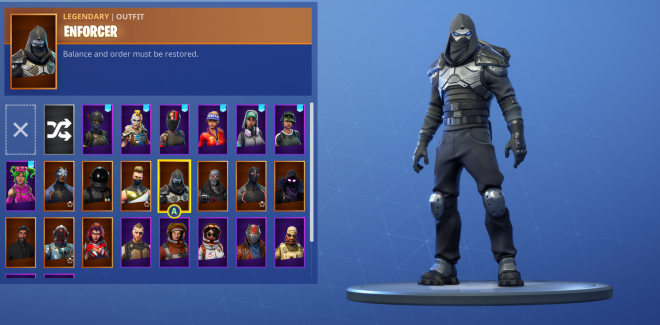
Road Trip Challenge Character
For completing seven weeks of challenges, you are finally rewarded with the character from the Road Trip challenge. Enforcer, as he’s called, comes with a shield type back bling. Enforcer does not currently have different customizable styles as the previous season’s secret character did. Here is what the character looks like:
Missing a few challenges from certain weeks? Be sure to check out our previous guides to help aid you in completion.
Fortnite Season Five: Week One Challenges Guide
Fortnite Season Five: Week Two Challenges Guide
Fortnite Season Five: Week Three Challenges Guide
Fortnite Season Five: Week Four Challenges Guide
Fortnite Season Five: Week Five Challenges Guide
Fortnite Season Five: Week Six Challenges Guide
Curious about the latest update? Be sure to check out our patch notes!
Fortnite Battle Royale v5.30 Patch Highlights
Want to get better at Fortnite? Learn how to Edit!
The Author
You Might Also Like