Spelunky Guide – Tips, Tricks and Secrets
Spelunky, Mossmouth‘s gift to the platforming and roguelike world, is not easy. In no capacity is it easy, and in fact as of writing I have died ~600 times. Sure, a lot of that was just to find information, but we assure you the death counts for this game will be in the thousands for most players. While every adventure through Spelunky results in a score, and surely that is important, the real goal here is to make it to the end and get the treasure spoken of only in whispers in back alleys and on forums. This guide has a deluge of tips and tricks for you to employ in your journey through Spelunky, as well as an ever growing account of all the secrets and unlockables in this game. Here’s the disclaimer:
Spelunky is first and foremost about adventure. It’s about failure, about dying, about losing, about learning from each and everything you see that inevitably kills you. Part of the glory of Spelunky’s design is finding out how things work, the nature of the AI and of the ever-changing environments. You should experience that, and you should do so without this guide. We recommend you not look at this guide until you’ve died at least 100 times. That said, if you’re frustrated, or if you have to find the secrets right-just-now, we welcome you to enjoy our wealth of information.
We have no intention of spoiling the whole game for you, so the secrets and unlockables are on their own page, away from the tips and tricks. That said, there are plenty of spoilers in here as well, but we have separated each and every collection of tips by section of the game to which they pertain. Everything you’ll experience for the majority of your “newbie” experience is just below and none of it is entirely shocking, though there’s much useful information there. At the very bottom of this guide is our tips to completion, and they include information from every single thing, including the secrets, but they’re also our most comprehensive (and tested) tips for success. We wish you luck, adventurer.
Surviving Spelunky
- Look down! Holding down will allow you to see what’s below you, and is one of the most useful things in the game. Always look before you fall.
- Also look before you leap, soaring through the air leaves you vulnerable to what’s on the other side, make sure you’re prepared for it.
- The whip hits above and behind you. Mastering this will be incredibly difficult, but protecting your head with the whip will be infinitely useful.
- Rope is the only object which flies straight up, and is the ideal way for protecting your head as it does 1 damage (killing most small enemies)
- By crouching next to a ledge and using rope, you can drop it straight down (the hook starts next to you, then the rope descends from there)
- When in the dark, re-light a washed out torch by bringing it to one you’ve already lit on the wall.
- Carrying a throw-able object with you at all times is useful early on, especially if you don’t have a weapon. A stone is ideal since it never breaks, but a vase, skull or arrow will suffice.
- You can fall an infinite distance without taking damage as long as you grab a ledge instead of hitting the ground.
- You can also fall an infinite distance as long as you land on an enemy.
- If stunned, you don’t take fall damage.
- Crawling over a ledge will cause you to toss your item; in a confined space, this item will hit you and knock you off the ledge.
- Thrown items have different trajectories based on whether you are rising or falling in your jump.
- Open-able items can be opened by pressing up+X as long as you’re on the ground.
- Health is usually better than money if you’re trying to win the game.
- When it’s dark, avoid throwing your torch unless you absolutely have to. Ideally, aim your torch for a wall-mounted torch so you have a beacon to go to until you find it again.
- Sometimes collecting the glowing beetles in the darkness is best saved until you’ve explored an area and no longer need the light.
- Damsels have three health, so they can tank some damage for you, but not a lot. They also will never jump, ever.
- Destroying Kali’s altar spawns tons of spiders at once.
- You can give idols to shop keepers and they’ll give you the cash for them.
Shopping shenanigans
- The shopkeeper will go after you if he’s damaged in any way, even if you don’t do it personally or directly.
- Using bombs or the mattock (pickaxe) anywhere close to the shop could set off the shopkeeper as well.
- Shopkeepers in the treasure rooms count as shopkeepers; killing or attacking them sets marks you as wanted.
- If you steal something from a shop without killing the shopkeeper, you have two levels of notoriety before they remove you bounty; kill a single shopkeeper and they’ll be after you forever.
- Shopkeepers can be stepped on and thrown like any other human enemy.
- You can buy damsels from kissing booths for 150% the price of the kiss and rescue them like a normal damsel.
Item information
- Anything in the entire game that can be purchased has a chance of spawning from a crate or being found in the ground.
- Nothing can get a sticky bomb off of itself.
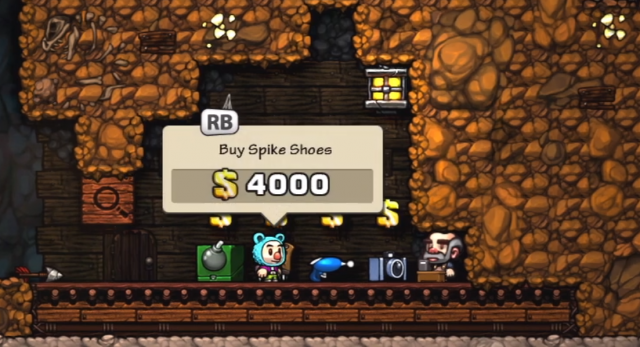
- Spike shoes allow you to do damage to large enemies by jumping on them.
- The mattock only lasts for so long before the head falls off. The head deals significant damage when thrown.
- Anything frozen by the freeze ray will be killed in one hit if you jump on it or throw something at it.
- The camera stuns everything caught in the picture.
- The teleporter can be aimed down if you use it in the air.
- Anything you land on when teleporting will die instantly.
The Mines
- Only spiders can ignore webs, all other enemies get caught in them forever.
- Giant spiders can be killed with a single bomb; ideally, you’ll want to throw it into the webs below them without touching the spider itself.
- The Scorpion takes two hits to kill, as such it can be sacrificed to Kali after the first hit if you can make it in time.
- Never run past a skull, it could always be a skeleton if there’s a ribcage next to it. Wait and see if it gets up before trying to attack it or throw something at it.
- Cavemen have 3 health and can also be sacrificed to Kali, dead or alive.
- Spike traps will kill you if you fall on them, but you can run through them or climb over ledges onto the same level as them and remain unharmed.
- Arrows from arrow traps can be blocked with the whip; good luck with that though.
- Gunpowder crates can be set off by even the slightest thing touching them. That includes dirt from explosions and even blood.
- After a boulder has stopped moving, another massive force (such as an explosion) will get it moving again.
- Fire burns webs.
- The treasure chest always has the Udjat Eye in it and cannot be destroyed.
- The Udjat Eye shows you where all hidden things are.
- The “I hear snakes” event spawns a snake pit full of treasure and usually crates. Be careful descending this as there are often arrow traps and, of course, snakes. At the bottom will always be a mattock buried in the ground.
- The “crawling skin” event spawns 4 giant spiders on the map often in close, concentrated spaces. Depending on your equipment, it’s often best to ignore these guys. If you do defeat them all, however, that’s roughly 7,000 gold or so.
- The shortcut at the end of the Mines will require 1 bomb on the first visit, then 1 rope, and then 10,000 gold.
Thus ends the spoiler-free area of this tips & tricks. The remainder of our advice pertains to items, traps and specific locations in the areas following the Mines. Each of these things includes content from the entire game, some of which you may not have seen yet. Down below each bit of tips will be divided by which part of the game they occur in, so you can stop if you haven’t gotten to a certain place yet. Remember, the actual secrets and unlockables for this game are on a different page, so go there if you’re dying to spoil yourself. If you are having trouble with a specific part of the game but are unwilling to venture beyond into spoilerville, feel free to tweet us @XBLAFans or email our me directly at todd@xblafans.com. Good luck out there, Spelunkers!
The Jungle
- Frogs can jump much higher in water.
- Mantraps will eat all enemies, even non-humans.
- Mantraps can be sacrificed to Kali.
- Monkeys do one of three things: steal money, force you to drop items (if it’s a bomb, the bomb will go off as though thrown), or stun you for a very long time.
- The Queen Bee drops royal jelly which provides an immediate 4hp boost.
- Snail bubbles can kill other enemies.
- Vampires are tough to kill, but they drop capes when they die.
- If you drop anything into a campfire, it will spawn a magma man.
- Tiki traps only do 4 damage.
- Each section of the tiki trap can only jut spikes out to either side- not both at the same time.
- The “running water” event ensures the entire bottom of the level will be filled with water, a tons of piranhas and a giant piranha. Very dangerous.
- The shortcut at the end of the Jungle will require 2 bombs on the first visit, then 2 rope, and then a shotgun.
The Ice Caves
- Yetis are immune to the whip unless knocked out.
- Yetis can be sacrificed to Kali.
- The Yeti King often drops a random piece of gear or weaponry.
- The purple blasts from the Alien Lord will kill anything instantly.
- Falling platforms will squish anything they land on.
- Landmines can be picked up before they explode.
- Spike boots prevent sliding on ice.
- A jetpack, climbing gloves or spring boots help dramatically in this area.
- Turrets (attached to alien areas) explode if stepped on or shot.
- The “psychic presence” event spawns an Alien Lord near the bottom of the map. It’s often over the exit. He will fire purple circles of death and is guarded by a force field. If you kill him, he may drop a rocket launcher. (at time of writing, have not procured weapon so I don’t know its name)
- The “4th of July” event is a reference to Independence Day. At the top right or left corner of the map will be a long column of alien architecture. At the top of it is the entrance to the Mothership. Inside are all manner of aliens, most of which are keen on blowing up the ship as you travel through it. Be prepared.
- The shortcut at the end of the Mines will require 3 bombs on the first visit, then 3 rope, and a key from the Mines on the third visit. That means you have to make it from the Mines all the way to the end of 3-4.
The Temple
- The Croc Man will kill anything it teleports into, including you and enemies, just like the teleporter.
- In coop, ghosts can extinguish magma men.
- Mummies are immune to lava.
- The locusts the mummies spit can be reflected with the whip; much like with the arrow trap, this isn’t the ideal way to deal with mummies.
- Anubis does not trigger tiki traps, but he is not immune to their damage.
- Anubis drops the Scepter when he dies.
- The Scepter fires a purple blast towards the nearest living thing that’s not you; if that thing has a corpse, it will attack it until it dissipates.
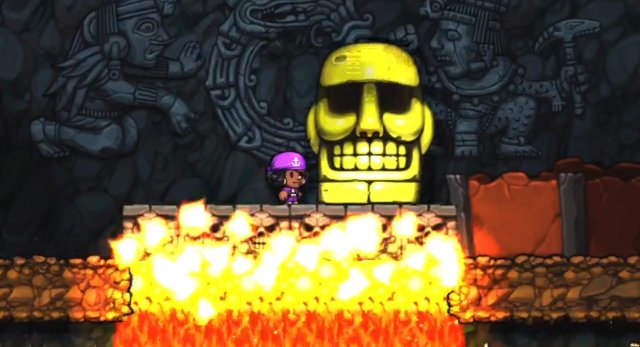
- Olmec must fully melt before he is considered dead. You’ll know because the door will open.
- Bombs that hit lava will explode immediately.
- Crush blocks can see you through walls.
- Physics kills everything. Use crush blocks to defeat mummies and Anubis.
- The “Kali prayers” event spawns a trap door area at the top of the map, usually near the entrance. This area contains a damsel and an idol. If you take the idol, the trap door opens immediately and you begin to fall. At the bottom of the pit is lava. Taking the damsel doesn’t activate the trap.
Completion tips
- Acquiring the Kapala is necessary whether or not you decide to use the Ankh. If you use the Ankh, the Kapala is a great way to get your health back; if you don’t, you’re going to have a ton of health!
- Jetpacks remove many of the game’s most harrowing traps and complications from their spot at the top of your “Killed by” list. Buy it, steal it, find it in the ground, whatever it takes to get this item.
- Getting to the City of Gold doesn’t make your life any easier, but getting the Ankh does. You should always try to get the Udjat Eye for this reason, or at least to have access to the Black Market.
- When the ghost starts coming, just leave. Nine times out of ten, whatever you’re trying to do isn’t worth it.
- If you have 3 or less bombs or rope by the time you reach the Jungle, buy more.
- Gear (gloves, boots, cape/jetpack etc.) is more useful than equipment (bombs, rope) unless you have no equipment remaining.
- Stay away from the Mothership. That rocket launcher isn’t worth it.
- Play conservatively in the Temple. There are way, way too many times where you’ll need to bomb or rope your way out of a mummy/Anubis situation; using a bomb to get money won’t be worth it. Unless there’s a shop like right there.
- If you have at least 3 rope, here’s an easy way to beat Olmec: run straight to him and wait for him to smash the Hawk man. Once he does that, run up against him. When he lands, he should create a very small niche for you to fit into along the left side. Then, proceed to run up against him and he’ll go straight down. Keep an eye on the spawned enemies and defend your head with the rope. Just before he crushes the final layer, grab onto a rope (throw another if you can’t reach) or use climbing gloves, jetpack etc. whatever you have. Easy victory, but it’s hyper dangerous if you’re not watching your head.
- Last but not least, here’s an easy way to beat Olmec:

