
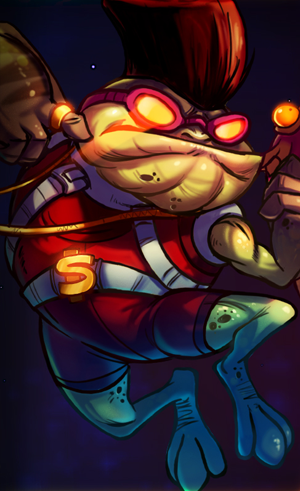
Awesomenauts Guide – Froggy G
 Abilities Breakdown
[springboard type=”youtube” id=”1N0rXx-W7qo” player=”xbla001″ width=”640″ height=”400″ ]
Special 1: Whirlpool – Whirlpool deals constant damage to anyone next to Froggy G for as long as Whirlwind lasts. Without any upgrades, however, Froggy is slower than usual while using Whirlpool. Froggy can’t do anything else while using Whirlpool. Whirlpool is ideal for damage, chasing and escaping depending on how it’s upgraded. By default, use Whirlpool to deal massive damage to enemies as they’re all bunched up. It’s important not to waste this ability due to its lengthy cooldown. As such, key times including dissuading a major push, defending an ally or just damaging the tower if you’re safe to do so.
Special 2: Splash Dash– Froggy’s dash is his main tool through which he accomplishes most of his goals. The dash can be performed in any of the eight directions, Froggy is invincible during it, and it stuns any and all enemies he connects with during the dash; so… it’s pretty damn good. Using it to enter combat is a great idea since often you’ll be able to use it to escape if you need to after due to a low cooldown. When in doubt, upgrade the Splash Dash.
————————————————————————————————————-
Support XBLA Fans by checking out the full Awesomenauts guide on Android and iOS ( Apple ).
![]()
![]()
————————————————————————————————————-
Builds
Level 2 Build
The level 1 build for Froggy is surprisingly full of options. For the most part, however, you get to pick from playing Froggy bursty, or as a sustained AoE damage dealer. You can play one way or the other no matter what, but since you have to choose between one thing or the other, pick the one you like most. However, we feel like the AoE damage route is the best application of Froggy at level 2, so if you can’t decide, go with this: Here’s what you don’tpick:
- Dash damage
- Whirlpool movement speed
- Attack range
- Boots
We’ve got the ground pound to give you that extra damage boost on entry for one but also to ensure that you’re hitting everyone around your main target. If you’re not good at hitting the ground with Froggy’s dash, don’t take ground pound no matter what. Since you’ll be in the middle of fights dealing damage, you don’t need to chase or run away with whirlpool on, just sit in fights and hurt everyone; leave the catching to your team. Typically, you’ll want to stay in the lane with the most people in it, but go where fights happen. This build should usually build the whirlpool shield first, maximum health, some regen and stun duration on splash, then focus as needed.
When you’re losing…
If you’re being pushed out or can’t stay alive in fights, build your maximum health up and get the whirlpool shield. Don’t use your splash to enter fights, just jump in from above and whirlpool, then dash out to safety. If you can afford it, get at least one level of health regeneration as well so you don’t have to go back after each encounter. It’s important to keep Froggy’s escape options open if you’re losing, so max the cooldowns on splash if you keep getting caught by your enemies. Remember, just because you’re losing doesn’t mean it’s time to give up, dissuade pushes and ganks by using whirlpool on characters with less health or escape power.
Our Build

With Froggy G we take stun, ground pound and cooldown reduction on the splash. The ground pound isn’t as omnifunctional as straight damage, but it’s a great item if taken at the beginning of the game. This makes Froggy’s splash deal 50 damage, which is a lot that early on, and clears droid waves almost instantly. Take the ground pound for early game harass and farm if your team doesn’t already have a lot of push power. This build doesn’t focus on dash as Froggy’s primary killing function, but rather his whole kit. His splash is utility (mixed with some damage) and should be used to stun, catch and escape. Note: if you don’t like the ground pound, switch it for the damage and go with the cooldown reduction first.
The whirlpool is the other early game option. Get your whirlpool’s shield, and then up the movement speed by one. Take health and cooldown on your splash early so you can function properly as a disruptor, entering fights, damaging everyone and then escaping. This path works very well when you are facing tanky, or support-heavy teams. This also helps when your team mates have a lot of range or require someone to take the focus of the enemy off of them. Ideally, this build wins long fights if you focus on both abilities. Stun your enemies, pack on the damage, slowly regenerating health while your enemy is waiting (either while stunned, or while your shield is up) and all the while pushing towers. Ultimately you’re not going to rack up a million kills this way. Unless…
You focus on your basic attack. If you join any game late (such that you’re in the mid-teens for level) definitely build this way! Max your additional attacks first, then speed, then damage, building health and regeneration as necessary. This path is tough to take if your enemies are going after you, but if you can pick up kills and farm freely, you should be able to finish it well before the game is even close to finshed. At max attack upgrades you’re dealing 27 damage per shot, cutting down enemies at an alarming pace. This build can win games in one push if you’re allowed to fight each enemy on their own. Build splash cooldown and whirlpool speed to create escape/initiation attempts so you can safely get in and out to deal damage.
When you’re losing…
If you’re losing, avoid your basic attack upgrades unless you’re already well into purchasing them. If you can finish them all you could turn the tide of the battle, but they’re very expensive so doing so from scratch won’t win you anything. Full regen and health are incredibly helpful on Froggy and allow him to stay around longer. Without any range, he has to get into the thick of things where he’s going to take a lot of abuse, so play defensively. There’s no benefit to assassinating characters if you’re the only one who can defend your towers. Use the splash dash to get behind enemies, then whirlpool the weaker or more important characters and chase them off. As long as you can end your attacks in a safe place, Froggy can hold off advances for a long time. You won’t need ground pound at all if you’re losing (unless you already have it) so avoid it, but max move speed on your whirlpool sends you flying across the map if you’re having problems escaping.
Variants
Hit Hop Get it, because he’s a rapper? Anyways, this variant takes calls for double cooldown upgrades and stun duration on the splash dash. Dive in and dive out, don’t even bother with basic attacks. Chip away at your enemies or create opportunities for your team mates to get kills. Take the shield and movement speed on whirlpool to add some damage and extra escape power. Hydropump More jokes! Take both damage upgrades and the ground pound on the splash for this insane build. With all the upgrades you’ll be dealing 80 damage if you hit the ground pound, 55 without it and that’s quite a bit. Take ground pound early for the harass power, then splash away! This variant is great for playing an assassin Froggy. Take boots, health regen and whirlpool speed and duration to ensure you can escape.