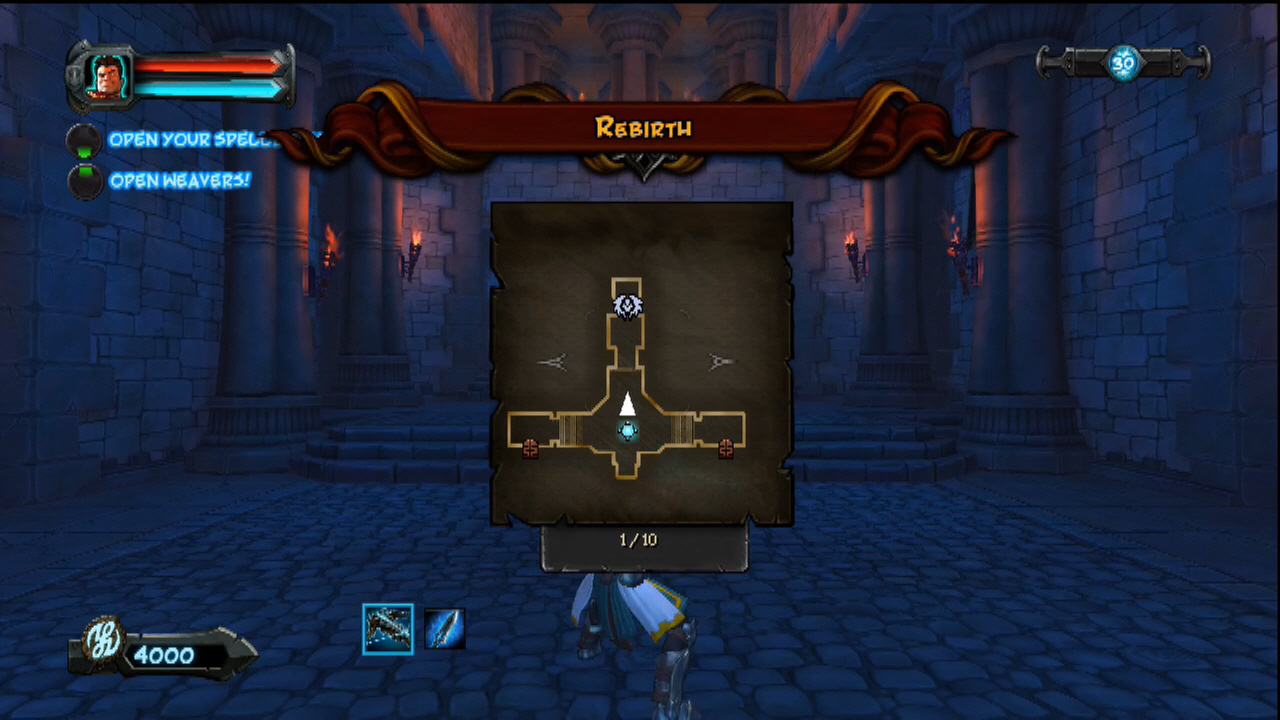
Orcs Must Die!: Rebirth (Level 19)
New weapon
Knowledge Weaver – This Weaver set is a bit of a hybrid between the two and supports a lot of different playstyles. There’s some bonuses for speed, some for spells, some for traps, and some special ones like giving the Rift an attack and having orcs be resurrected to fight at the Warmage’s side.
Enemies
Orc Warriors
Crossbow Orcs
Hobgoblin Shaman
Gnoll Hunter
Ogres
General survival skills
- The entire first three waves are from the North, so start there
- Use tar traps liberally to the East and West as managing both sides simultaneously will be difficult
- Use the poison cauldrons to the East and West to help thin the horde
- Consider the wind belt for pushing foes back on either side
- PALADINS!!!
Five skull guide
This is the beginning of the end of the game, and it’ll feel like it. Onset from both sides as well as from the North, things won’t be easy on this level. Waves 1 – 3 are easy peasy, just split the choke point under the roof with barricades and put a swinging mace on either side (vertically), use tar and brimstone traps liberally and the front should be pretty secure. The big thing to watch for early on is the third wave, use the ice amulet (or whatever is most comfortable by this time) to deal with them, and quickly follow up on the shaman or they will bring the Gnoll Hunters back to life.
We recommend forgoing Weavers for the moment, at least until the trap setup is enough to by time to fend off the horde. Speaking of which, the West opens up in wave 4, and the East in wave 5. Both are easy, setup the traps for the West in the Go Break (swinging mace, barricade or tar traps and a paladin) then setup for the East. At this point, decide whether or not to go symmetrical, we went symmetrical but perhaps defending only one side might be easier, though paladin are always great insurance for playing both sides equally. Wave 6 will require liberal use of lightning cloud or firewall (anything magic, really) to thin the horde, kill the horde, stun, freeze, pick which ever you want it doesn’t matter but this wave is where the rift will get hit if any. Also, never forget about the poison cauldrons! Hit them as often as possible.
Wave eight is the next wave to watch (though wave seven may be tough if not prepared for each door to be attacked) as shaman will sneakily show up after the Gnoll Hunter rush and revive them. Having paladins at this point is essential as the Gnolls will go for them first, making them easy to pick off after, just be sure not to let any of them die. In contrasting fashion, wave nine is the easiest thing ever, consisting of a ton of Crossbow Orcs who should be promptly destroyed by AoE magic, the trap setup, and the cauldrons.
After the last Go Break Mr. Warmage should have plenty of money. Gate A is laughable, the trap setup since the first Go Break should be adequate (throw in a spell or two if things are looking uncomfortable) and Gate B&C’s Gnolls should be handled swiftly by the traps, but the Ogre combined with the Orc horde could mean trouble, especially if taking the asymmetrical defense route. Ideally, the money earned for the last Go Break should all be spent on Paladins. Yes, that means we didn’t employ Weavers on this map.
Waves
- (A – North) Orcs
- (A) Orcs again!
- (A) Orcs & Gnoll Hunters, Shaman & Orcs
- (B – West) Orcs
- (C – East) Orcs
- (B&C) Orcs, ShamanGo Break
- (A) Orcs & Shaman, Archers (B&C) Orcs
- (A) 4x Gnoll Hunter, 2x Shaman
- (B&C) ArchersGo Break
- (B&C) Gnoll Hunters, 1x Ogre & Orcs(A) Orcs
Go Break


