
Dungeon Defenders Insane Challenge – Assault

Challenge – Assault
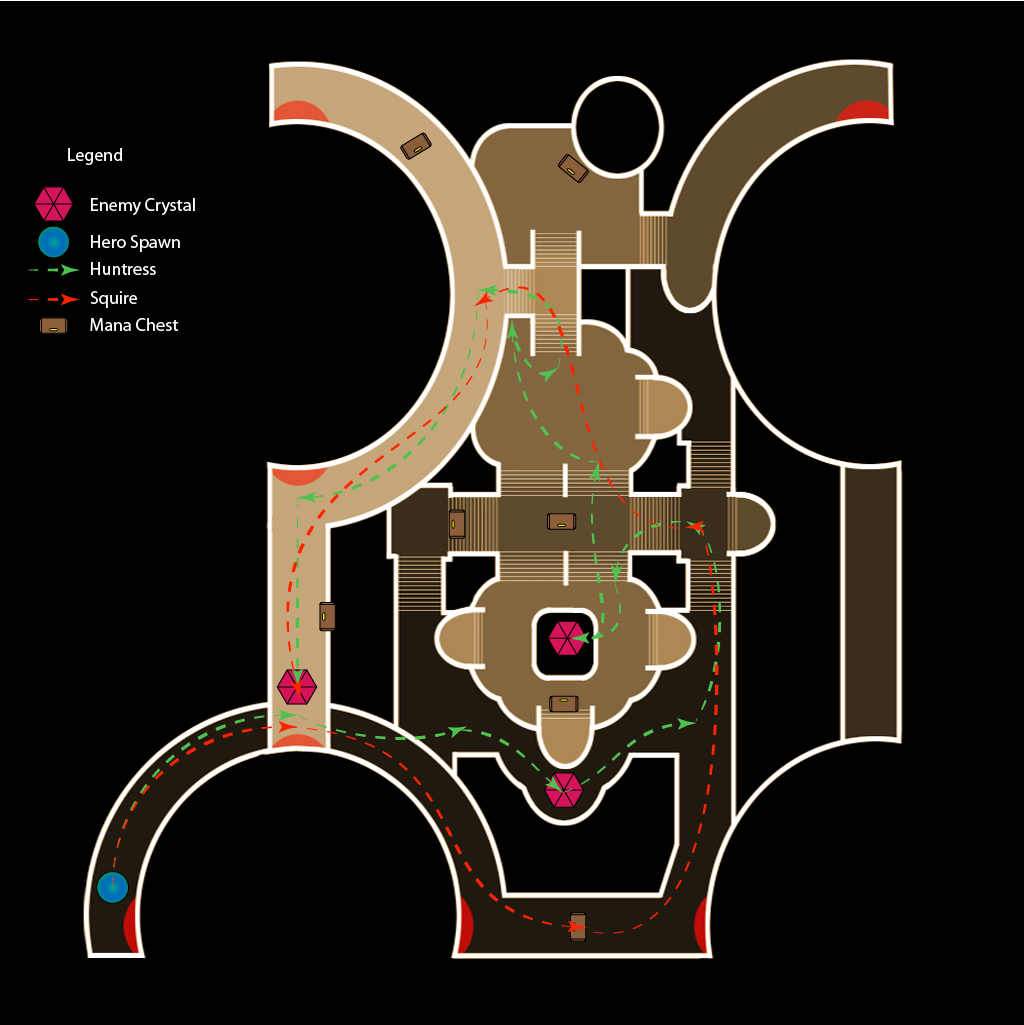
Recommended group – One Level 70 Huntress, One Level 70 Squire.
Reward for completing on Insane – Huntress – Blasticus
Defense Units – 0
This is a tough challenge but very fun, at least at first. You’re going to need an intelligent Huntress with either a powerful Crystal Tracker or Blasticus, not much else can substitute this. You are also going to need a Squire with a weapon that can do BIG damage on the last crystal.
Some things to remember are; crystals aren’t resistant to element damage so therefore because the Squire is only needed for the last crystal its recommended that he carries a large DPS elemental weapon. Its not actually range that is limited, just projectile air time. Which means if you have a weapon with at least 2 500 Projectile Speed, you can hit anything at any distance including crystals. The traps range is limited to how big the visible radius is on the ground. Once you reach the third crystal it largely falls down to the Squire to be able to finish the level, as he has the most health and coupled with his Blood Rage Ability he can take care of the crystal in a few hits.
The Huntress must use her Piercing Shot ability constantly to be effective, this is where the major blows come from. The first crystal should provide no challenge at all and needs no explanation. As for the second crystal if you go to the right side approach, the stairs just before the Bowling Ball turret stairs can be tricky. One hint is that if you sit just outside the enemy turret radius on the stairs you can jump and Piercing Shot them.
Once past that jump on the torch to the left side of the stairs to knock out the Bowling Ball Turrets and bypass the Ensnare Aura, when your in it shouldn’t be a problem to knock out the crystal.
The next enemy encounter which may provide some resistance is the stairs just before the last crystal, however there is a trick to taking out all enemies and turrets without taking damage for the Huntress. If the Huntress sits in the little corner between the wall and the stairs she can jump and Piercing Shot through the floor, this can reach everything on top of the stairs.
Let this be said, this last part is where you probably fail. Its basically a ledge filled with death, and you have little time to formulate a strategy. So we did it for you! This part is largely open to interpretation as to how you complete it, because it involves a fair amount of luck and there is no real fool proof strategy.
The first way to do this is openly push through destroying everything you can reach before dying, not great but has been known to work. The second way is to stick to the left side ledge and sacrificing one player to take the Ethereal Spike Trap out of business for a few seconds, allowing a second player to jump almost straight to the crystal. This will generally work as long as nothing goes wrong.
The third and quickest way, if practiced can be achieved every single time. It basically involves jumping from the first torch fire on the left to the right side Harpoon Turret, from there you can jump straight over the Bowling Ball Turrets on to the top of the Slice N Dice turrets and finally to the crystal. The main thing to watch out for is the Ensnare Aura and jumping into enemies, other wise this is the most fool proof method found.
A full run through of the level including each third crystal strategy can be found in this video for your viewing pleasure.