
Skulls of the Shogun – XBLA Fans Guide – Region Four
Hello and welcome to the XBLA Fans guide to the fourth region of Skulls of the Shogun. On this page, you’ll find a walkthrough to each of the levels in this region, as well as how to win all of the gold skulls for the area. Enjoy!
Please note that to get the most achievement points possible from Skulls, you’ll need to play on normal difficulty, which is the default anyway.![]()
![]()
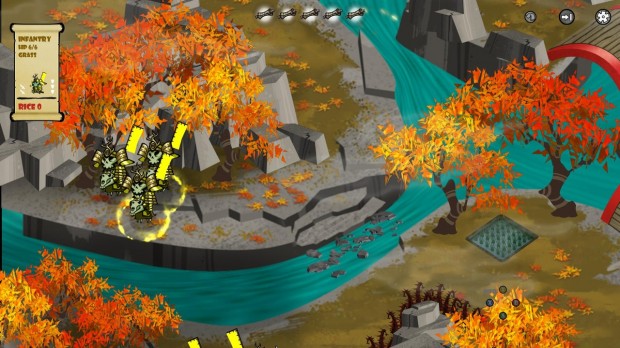
Region Four – Level 1 – Fujin Falls
Round 1
Whatever else may happen on this level, the first two rounds are always reasonably straightforward. Move both cavalry (on the right) forwards towards the ford as far as they will go and then move Akamoto up behind them. On the far left, move one of the archers to the bamboo and use the infantry to capture the shrine.
Round 2
On the enemy first turn, only one of two things seems to happen. If the enemy sends 2 cavalry towards your infantryman on the left (one will eat a skull and the other will attack) then you should use the archers to take out the closest one and then defeat the other with your crow monk by blowing him off the edge. If this happened, then the enemy will have brought an archer and an infantryman towards your cavalry, so kill the archer and make sure your guys end up in a spirit wall.
On the other hand, if the enemy send just one cavalry up the left, blow him off the edge. This will mean that you have 2 infantry and an archer to face on the right, which is tougher. Kill the archer with both cavalry and ensure they form a spirit wall.
Round 3
Depending on how things have gone so far, you’ll now be facing a reasonably clear road through on one side or the other, whilst the opposite will be more troublesome. If the enemy did send 2 infantry up on the right then chances are you’ll be down a cavalryman. You’ll need to do what you reasonably can to keep him alive (eating the skull or drinking the potion are good options) and bring Akamoto up to get in the fight. Make sure you finish this turn in a spirit wall if there are any enemies left, as losing Akamoto is an instant loss. At the other side, no matter what turn it happens on, the enemy will bring the other cavalryman around and you will always have the chance to gust them into the water. Chances are the infantry will be in range for your archers too and on the next turn, it’s likely to kick off big time, so take the chance when you have it.
Round 4 and beyond
Once a unit enters the second ford on the right hand side, the enemy will reinforce from the two pathways at the bottom of the map. On the left hand side, a couple of infantry and a couple of archers will turn up, whilst on the right, the enemy will bring cavalry and infantry. On the right hand side, you may have chance to finish the last infantryman (at which time you’ll receive a cutscene featuring Sakura) and possibly heal either Akamura or the cavalryman by capturing the crow monk shrine. You may also be able to get Akamoto on his way to demon mode here, as there will be 3 skulls around and of course, he gets 2 actions!
On the left, things get tough quickly. It’s worth noting that once the enemy reinforcements arrive, it’s very hard to bring the crow monks into play until the enemy cross one of the fords. This is extremely useful on the left, as the enemy has a tendency to bring two infantry up and park them right to the left of the ford. If you’ve been patient and your crow monk is around, have him blow one of the enemies into the water (gust ignores spirit walls) and then have your infantry (which you could be in demon mode by round 5 if you have used the skulls wisely) knock the other into the water. Your real problem here is the archers and the most effective strategy is to retreat up the behind the rocks, drawing them over the ford and then killing them with the infantry or crow monk. Another effective tactic is to have the demon infantry attack each archer once, then you can finish with an archer each. None of these are an exact science though.
As always, before you cross the bridge make sure you have collected as many skulls as you can, preferrably to create a few demons. It is especially useful here if you can manage to demon up both crow monks, as this is a great level to aim for the “Gone with the wind” achievement (see below.)
Turn 8 (or whenever you cross the bridge)
If you want to achieve the Gold Skull for beating the level in 14 turns or less, then you’ll need to be crossing the bridge by around round 8 really. It’s not easy to achieve, especially as perhaps the best tactic on the left side involve a bit of waiting, but it can be done. Once you cross the bridge, this level can become a little academic, as although the game encourages you to head for the safety of the shrine on the left hand side, victory actually rests on a straight race to the shrine at the top of the mountain.
It goes without saying that if you have the orders available you should grab every other shrine and paddy you can (especially the salamander monk shrine) but focus on that right hand path up to the summoning shrine. You’ll find that the enemy will make repeated attempts to haunt it, so demon archers are extremely useful here. The Salamander monk has a bit more range than an archer, so he is also useful for this duty. Eventually you will push on far enough to claim the shrine yourself, which effectively ends this battle.
Achievement Note – Gone with the wind
There is good chance that you’ll be able to get the gone with the wind achievement on this level if you manage to use the crow monk’s demon attack (typhoon) to knock 3 enemies off a ledge at the same time. This is best done on the very top of the falls, whenever enemies are bunched together in a trio.
Gold Skull 1 – Beat level with at least 4 allies still alive
A very easy, almost impossible to miss Gold Skull here unless you REALLY have to rush the end to get the second one instead. Just either keep your units alive or buy new ones right before you kill the enemy general, it’s that simple.
Gold Skull 2 – Beat level in 14 rounds or less
This can be a tough one if things go wrong during the first half of the level. If you cross the bridge by around turn 8 though, you should be able to manage it.
Gold Skull 3 – Beat level with at least 2 crow monk allies alive
Another easy one, especially seeing as crow monks are free and you can’t really miss the two shrines early on. Just make sure you keep them alive as things heat up at the end and use them for light duties, like stealing rice and occasionally gusting enemies off the edge.
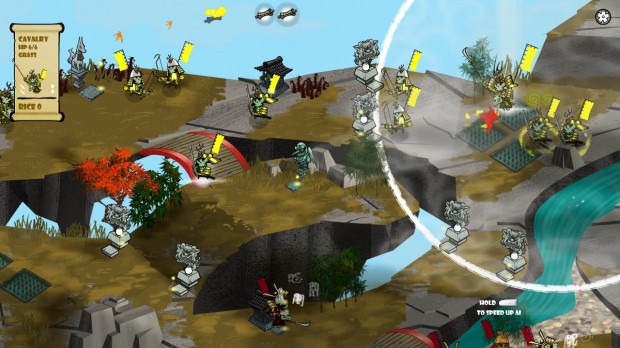
Region Four – Level 2 – Lion’s Labyrinth
Before beginning this walkthrough properly, we’ll just fill you in on the locations of three potions near the player start point, because you’ll probably want to grab them as you go, even if we don’t specifically tell you to. The first is a red potion near the rice to the right of the start point, whilst the second (green) is in the bushes just by the summoning shrine above. The third is in the reeds and bushes to the left of the start point.
Round 1-3
One of the most interesting levels in Skulls in our opinion and there are lots of ways to play this one. A good approach is to rush out quickly and try to disrupt the enemy plans to claim cleansing shrines. A winning tactic during the first 3 moves is to win as much easily defensive ground as possible. Begin by sending the two right hand cavalry to begin capturing the cleansing shrines just up and right from your starting point (over the bridge.) In doing so, the red potion should pop out – have an archer drink in. On the left, send the two cavalry out – one of whom will reach the left hand shrine. The other should drink the green potion.
On the next turn, you’ll probably have lost a cavalryman on the right hand side. Use the archer (who is deadly with an attack power potion) to kill at least one enemy infantry. Use the cavalry to capture the other summoning shrine. Bring up an infantryman towards the central summoning shrine (the green potion will pop out for him to drink.) On the left, the enemy will more than likely have begun to capture the 2 left most summoning shrines. Attack the left hand cavalryman with both to kill him, or if the enemy didn’t go there, just try to capture it.
By the third turn, things will be starting to diversify, but you should be able to clear the enemies (who are likely to prioritise one or both of the cleansing shrines) on the right side using the archer, cavalry and damage from those shrines. Capture the summoning shrine in the middle. On the left, you will have one or both cavalrymen still alive and more than likely one of the cleansing shrines – consider going up to the top left to capture the crow shrine, as it is handy to remove an enemy unit and gain one in such a simple move.
Round 4 onwards
This level is a tough one to write a step by step guide for, because there are so many variations in what can happen. The key is really the two shrines on the right hand side and to a lesser extent, the two in the middle. If you can hold those 4 and take all of the resources within, you will be able to wear down the enemy without having to rush out and risk the damage taken from the shrines – this is obviously especially true if you want that last Gold Skull.
The summoning shrine on the left isn’t ever going to be much use we’ve found, but the one on the middle is key and the two shrines here should also be high on your list of priorities, because not having them makes it very tough to access the only monk you’re likely to keep hold of on this level (the left hand one will be recaptured a lot usually.)
Remember that there is no enemy general, so with your uber archer and the 4 modest rice paddies near your start point, you can actually hang back and kill all the enemies with relative ease. If you’re not after that last Gold Skull, then a good idea is to work your way around the right hand side, up across the top and once you take the last summoning shrine, you should have no more problems.
Gold Skull 1 – Beat level owning all cleansing shrines
You should be able to achieve this one just by controlling the battlefield. Wait until the enemy only has one unit left (preferrably a fox monk) and then capture the shrines one by one.
Gold Skull 2 – Beat level with at least 4 demon allies alive
Similar to the first Gold Skull, this one can be beaten just by waiting until the endgame, then wandering around demoning up your troops.
Gold Skull 3 – No allies damaged by cleansing shrines
This is quite a tough one compared to the others and can be frustrating as the zones of control are not always clear. Here is a rule of thumb for you – don’t venture beyond the right hand pair of cleansing shrines, capture the middle two (and leave the crow shrine) and then hang back after taking the 4 rice paddies closest to you. You can take the right hand summoning shrine if you get there before the enemy captures the left most cleansing shrine, but if not you’ll have to leave it. Once you have your little siege castle set up, just let the enemy come and wait them out. Your red potion archer and troops with green potions (you should have 2) will see you through, especially once you start to eat skulls. It’s worth remembering that cleansing shrines only hurt if you’re in there zone at the end of a turn, so feel free to run out for a skull and then come back.
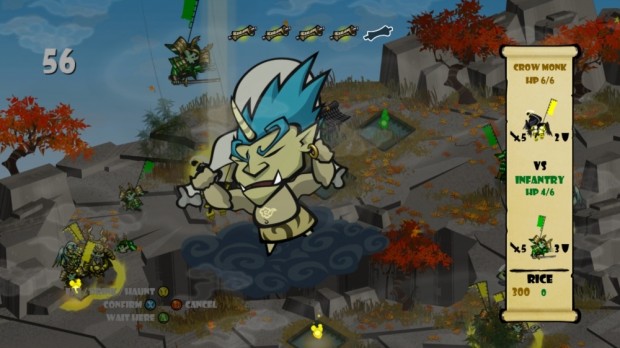
Region Four – Level 3 – Chaos Canyon
Round 1
Early control is key to winning this level easily, so listen carefully! At the start of the level, send a cavalryman and an archer in each direction. The right fork cavalry can take the fox shrine and the archer the summon shrine, whilst on the left, a cleansing shrine and a rice paddy. Send the infantryman up the middle fork towards the crow monk shrine.
Round 2
The enemy will press the attack down either side. The left is really the main key for you, as it allows easier access to a monk (the salamander) and it also allows you to easily cut off the enemies only easy to reach summon shrine. If the enemy only send one cavalry down this left flank, capture the salamander with the cavalry and the other cleansing shrine with the archer. On the right, capture both far away cleansing shrines with the fox monk and the cavalry. Now either bring up the infantry in the middle to capture the crow monk shrine or use the right hand archer to take the rice field in the middle of that fork.
Round 3
You’ll probably find one of your cavalry is killed this turn, depending if the enemy came up the left or right. If they went to your right, it makes things easier because you can reinforce from the shrine. If they went left, you’ll need to bring round the crow monk and drop the salamander and archer back behind the two cleansing shrines.
Round 4
You’ll find the battle for posession of the shrines on each flank continues, so just stay in there and try not to lose too much. If the enemy has come right you will start to push them back in this round because Sakura will have provided you with a large gift of rice, which makes this level practically unloseable.
Round 5-6
The enemy will reinforce behind Akamoto on round 5. Depending on what else is going on, you can awaken him and with 1-2 units (infantry from the centre, maybe a summoned archer on the right) you can take them out easily enough. The main benefit here is that they are pretty unlikely to really hurt Akamoto, but they do provide enough skulls to demon him up real quick.
Round 7 onwards
If you have not already done so, you need to consolidate the left flank. Chances are the right is all yours by now, due to infinite reinforcements if nothing else, so you need to stop that summoning shrine on the left. Go do it with demon Akamoto and you will have no problems finishing off the enemy. Isolate the general on his own and use a crow monk to gust or typhoon him off the edge for a nice Gold Skull.
Gold Skull 1 – Knockedback enemy general over ledge
This is one of those Gold Skulls that just requires luck and timing. You can draw the enemy general towards the edge, but you also need to finish him. A demon crow is good, because 2 gusts will allow you to line up the shot, or alteratively a typhoon is more powerful. Well, actually, 2 typhoons is gonna get it done!
Gold Skull 2 – Beat level owning all monk shrines
This one is easy and should just happen for most people. The most exposed is the fox monk shrine on the right, but because of the summon shrine just below, you should be able to handle it. The enemy rarely even bothers coming down the middle for the crow shrine.
Gold Skull 3 – Defeated at least 5 enemies using the crow monk
Just exactly what it says on the tin. The trick with this is actually having enough enemies left to get the crow monk in place to kill. If you lock down the summon shrine on the left, you will struggle with this one, so just engineer the situation in your favour and it won’t be too hard.
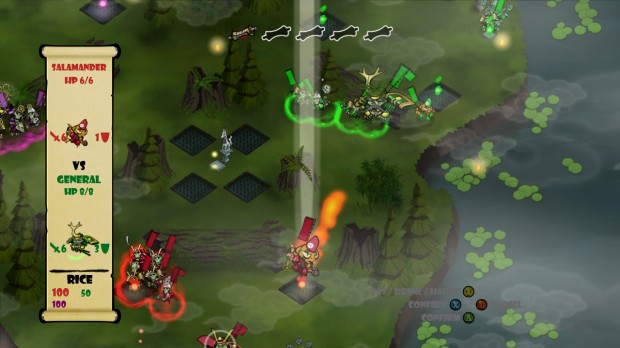
Region Four – Level 4 – Autumn Assault
Rounds 1 – finish
This level has proved impossible to guide step by step, because it is so variable and quite large. So instead, here are some sound tips and strategies which should get you through.
Early on, you’ll need to avoid those three archers up on top of the rocky outcrop and in fact, this whole level can be completed without ever really worrying about the left side of the map. Instead, use a cavalryman to capture the right side cleansing shrine on the first turn, then another to go into the rice paddy next to your starting position. You’ll notice a red potion which you might want him to drink turn 3 (after capturing the rice.) You can send a cavalryman with some infantry support over the ford to the rice fields and fox shrine, which you will need to do if you want the 800 rice Gold Skull. It should be quite defensible and doesn’t come under fire from the cleansing shrines, but you will be in range of the archers on the square closest to the waterfall, so wait until the archers are disrupted. Don’t miss the crow shrine right in front of you at the start either.
To cause the aforementioned disruption, you need to use the 2 cavalry that are still on the right (the one who captured the initial cleansing shrine and the red potion one) to attack the two archers on the far right, whilst the enemy messes around with the rice. You’ll probably be able to get the upper hand on this side even with your limited starting units and once you have something tough move up (infantry preferrably) you should try to capture the left hand cleansing shrine, which covers the right hand path. With luck, the archers across the way wont rouse themselves to attack you, but the cleansing shrine will start to hurt them one turn at a time until they die or retreat.
You should be working your units up that right side now, including Akamoto once he hits about 14 health, as there should be lots of skulls. Capture the summon shrine here too, then go up the right hand stairs to where the general lies in wait. Capture the two cleansing shrines on the right and expect to fight for them a few turns. The enemy will keep coming, attacking your haunting units and trying to retake them, but it’s easy to hold this position with a couple of demon cavalry and a crow monk. Once Akamoto arrives, head in there to kill the general (who usually doesn’t awaken) for an easy 2 Gold Skulls (800 rice if you didn’t spend anything) and kill the general with your general.
Gold Skull 1 – Enemy general defeated by a cleansing shrine
This is a bit of a chance one really. If you can dominate the battlefield and capture all four cleansing shrines around him, you can just damage him and retreat. It’s still chancy though, because we know of at least one team member whose general was attacked by the enemy general when trying this trick, only to kill by counter attack and miss out on both the cleaning shrine AND killed by a general Gold Skulls.
Gold Skull 2 – Beat level with at least 800 rice
This is a pain to achieve because you’ll need to capture at least a couple of the enemy held rice fields quite early, or steal rice from them at least. Each paddy produces 150 rice in total, so you will need to capture 6, or 5 and one successful steal. The easiest way to do it is to grab the 2 paddies near your start position, the most exposed one near the fox shrine and then any two of the ones on the right side, which the enemy control. The left side fields are mostly a lost cause.
Gold Skull 3 – Defeated enemy general with your general
Does what it says on the tin. This is a level where Akamoto can be useful anyway, due to his attack power, high chance of achieving demon status and the lack of an enemy general who will take the offensive first.